Ever since the Allegiance Battles game mode came out in Fire Emblem: Heroes, and I’ve successfully summoned a pair-up hero, I’ve been scoring in the top 1k most of the time.
As of December 22, 2019 (the previous week), the base score you need to achieve top 1k is: 744. If you have 742 (2 point difference), then you will not be in the top 1k.
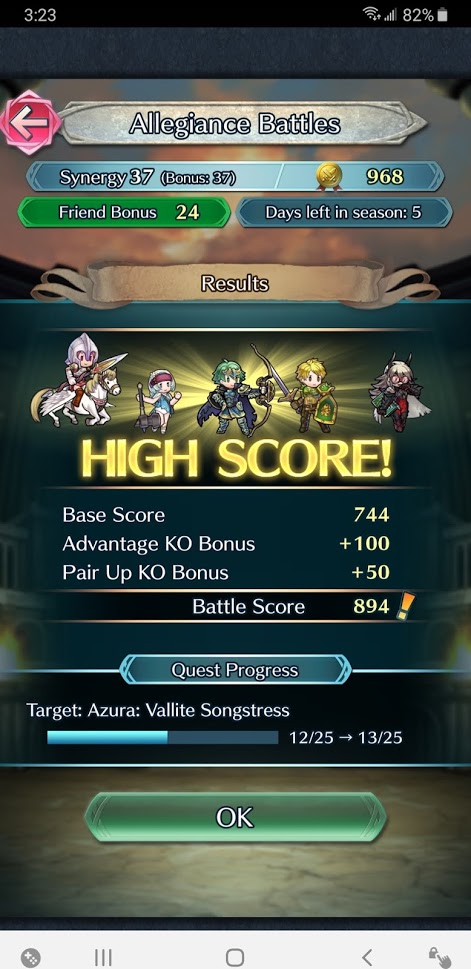
The score floor will likely to increase in the future. To achieve the score needed to achieve top 1k, you need:
- The maximum Synergy Bonus (as of December 22: 36)
- The maximum Friend Bonus (24)
- The maximum Quest Bonus (25)
- All the bonus kills using the pair-up allies (50)
- All the color advantage kills (100)
This will result in a score of 979, in which I ranked about 740 out of 1000.
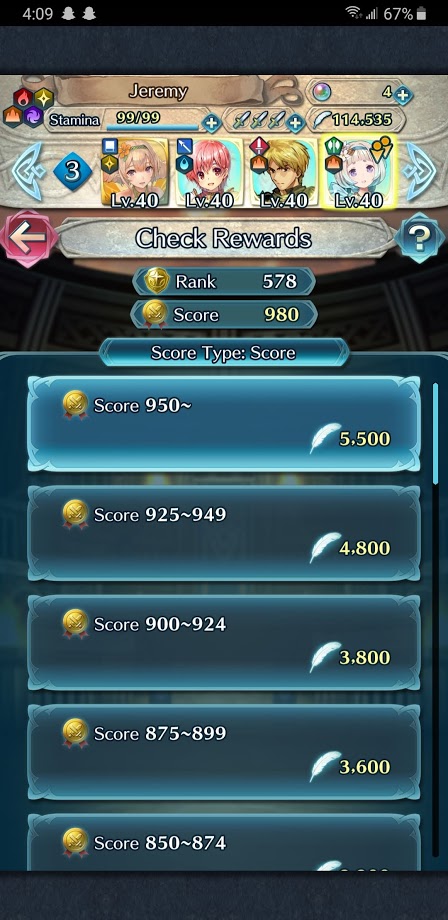
Here’s a screenshot from the current week (12/23/2019 – 12/30/2019):
Below is my ranking from the current week, in which the Synergy Bonus went up by 1, thus resulting in a score of 980. Note: the team above is not what I used, it’s just the team I had selected when I went into the AB rewards screen.
Maximizing Bonus Kills
Basically, you have to defeat all of the enemies using the unit with a paired-up triangle advantage unit. This means that you need one of your heroes on your deployment party has to be the pair up unit. There are four colors, and you need one of each color. For this week, I used L!Alm. Depending on the season, I’ll use L!Alm, L!Eliwood, or L!Lief because I don’t have any other Legendary Pair Up Heroes.
See the strategies section below to see some tips on how to get all the bonuses.
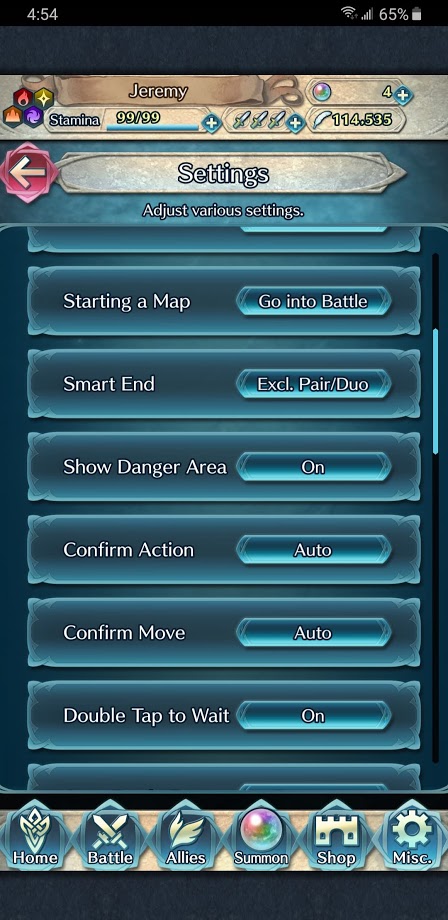
Settings: Make sure that the Smart End setting is set to “Excl. Pair/Duo” so that you can switch which ally is showing after you have moved them. Once I changed this setting, AB because much easier.
My Current Allegiance Battles Team
The current AB meta involves a lot of tanking and smart player-phasing. Often times, I find myself surrounded on both sides and need to tank enemy units but tactically defeat some of them on the counterattack. For example, I might tank Stahl with my Ylgr because I don’t have any other options. Ylgr doesn’t defeat Stahl on the counterattack, which is a good thing, because my pair-up blue unit has to defeat Stahl.
Currently, this is how I manage to have a base score of 744:
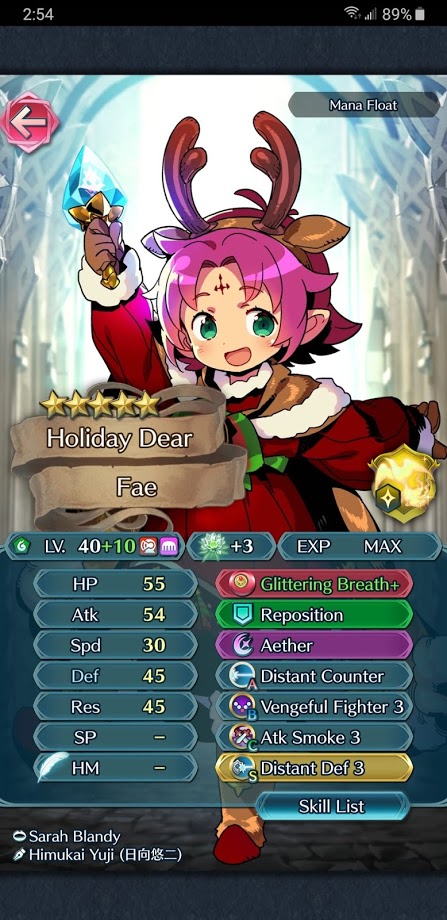
Est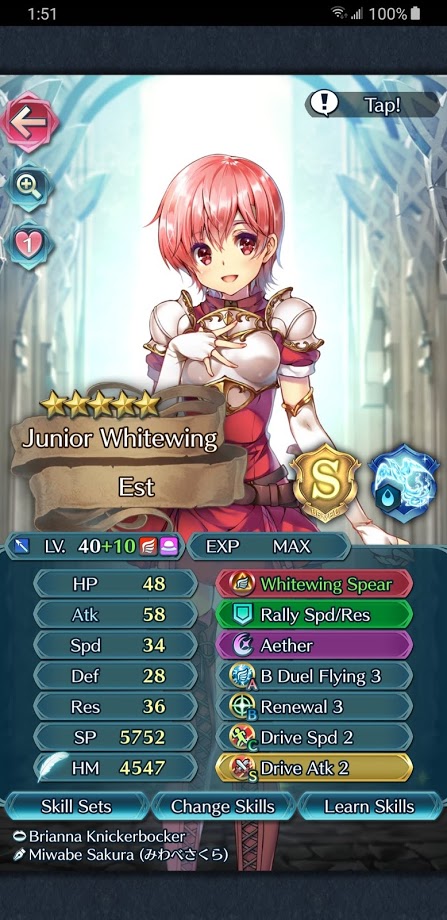
Est is one of the few useless units I have to bring along. She’s there for scoring and for support. Because of the way that AB works, two of the units you have to bring can’t do anything, because if they get kills, then you lose out on scoring.
(*Note: Since I only bring one pair-up legendary hero, I have to bring two “useless” units. If you are able to bring more than one pair-up legendary hero into battle, then you have more units that can actually do things.)
A lot of the time, I attempt to tank someone with Est, but then she defeats them on retaliation because she’s too powerful. Sometimes, I feel like she should be running Iote’s Shield Seal because archers are a common threat to face in AB.
Ylgr
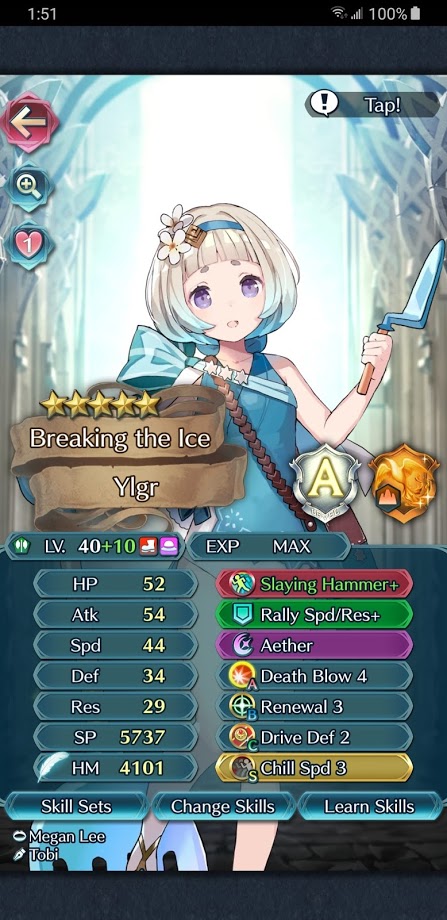
Just like Est, Ylgr is just there for scoring and support. I put Chill Spd on her because a lot of the time, there are ridiculously fast units in AB, such as Claude and annoying dancers which increase the speed of their allies, such as L!Azura.
Astram
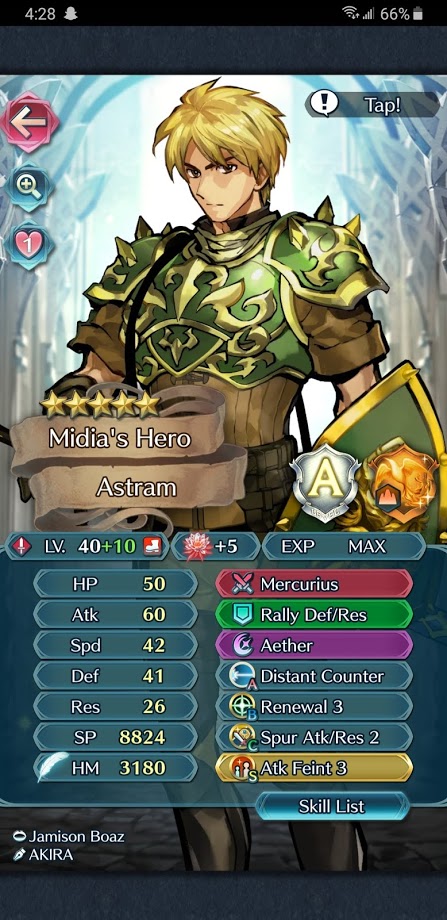 Astram is my red unit, whose only purpose is to defeat the green units in AB. I use him because he scores high and is a good free to play option. His kit isn’t the most efficient, but that’s what I chose to run.
Renewal is crucial because I often use Astram to tank when I get cornered. He’s able to withstand many blue units attacking him without defeating them on retaliation. Of course, he is powerful enough to defeat a lot of units, but through calculations, I can make sure he doesn’t defeat the wrong unit on his counterattack.
There are often green mages in AB so running distant counter helps a lot.
Pair Up: Alm
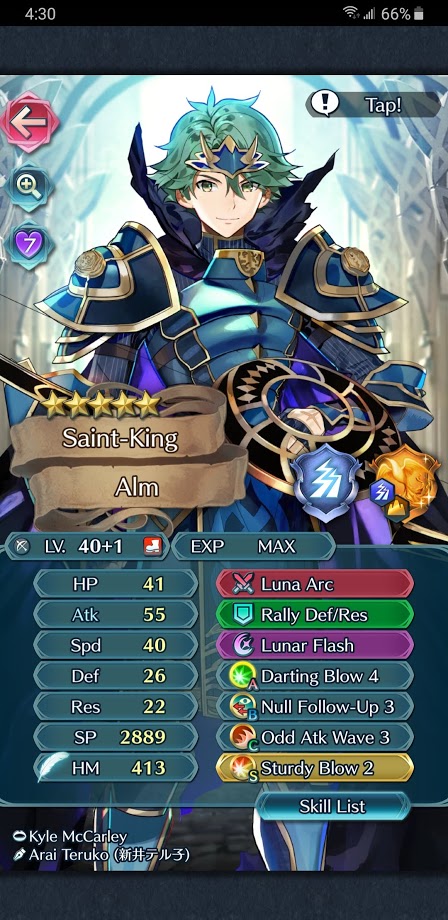 I usually run either Alm or Leif (depending on the season), and pair them up with Reinhardt. Both of their jobs are to defeat the colorless foes, which is not always easy. Running into dazzling healers or extremely fast units like Claude makes enemy-phasing much more difficult.
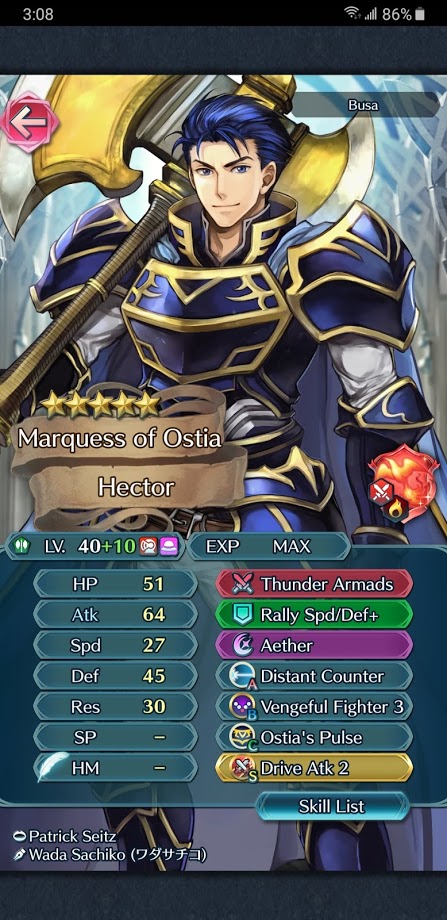
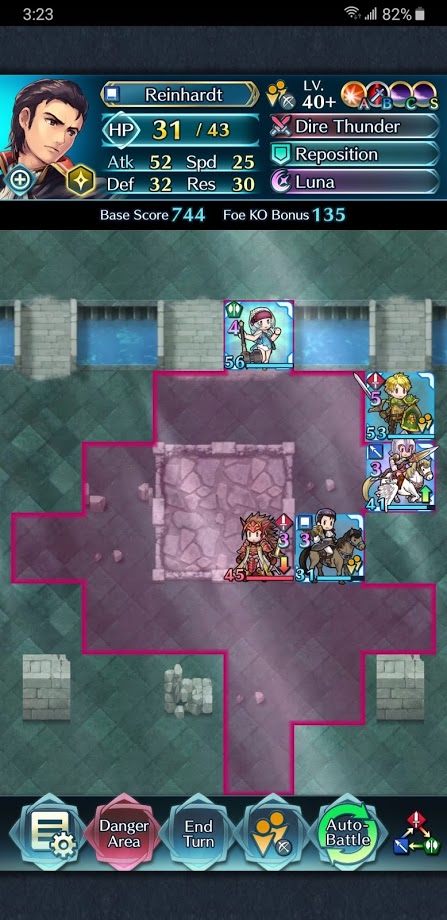
Paired Up With: Reinhardt
 Reinhardt is such a good unit. Because his only purpose is to defeat Red units, I gave him Swordbreaker in order to deal with annoying units like Seliph or Sigurd.
Reinhardt is a really good tank, and when I get cornered and run out of options, Reinhardt can tank a lot of physical red units, mainly because I run swordbreaker.
I gave him Reposition because since he’s the Cohort unit, his scoring does not matter, so I can run a movement assist skill.
Double savage blow is there in order to help Alm or Leif when dealing with extremely bulky people such as Caineghis, Fallen Tiki, or Silque, a tanky healer who Alm can’t one-shot.
Tips, Tricks, and Strategy
Here are some tips, tricks, and strategy which I have used, developed, and refined during my time playing AB. Note: this isn’t the first time I reached 1k AB, I’ve pretty much been in the top 1k AB ever since I got L!Alm on his debut banner.
Choosing a friend’s unit to borrow:
I have to choose a friend to pair up with my Astram. Since my team includes Alm/Leif, Reinhardt, and Astram, I need a friend with a green unit. It doesn’t really matter much which unit I use, as long as they have distant counter and aren’t super weak. Here are some of my friends whose units I choose:


 Having a lot of friends with units you want to borrow makes it easy to retry. If you don’t have a lot of friends with the correct-colored units, AB is going to be much more annoying because you have to wait until the next day.
Choosing units with distant counter helps out a lot as well, because there are a lot of mages.
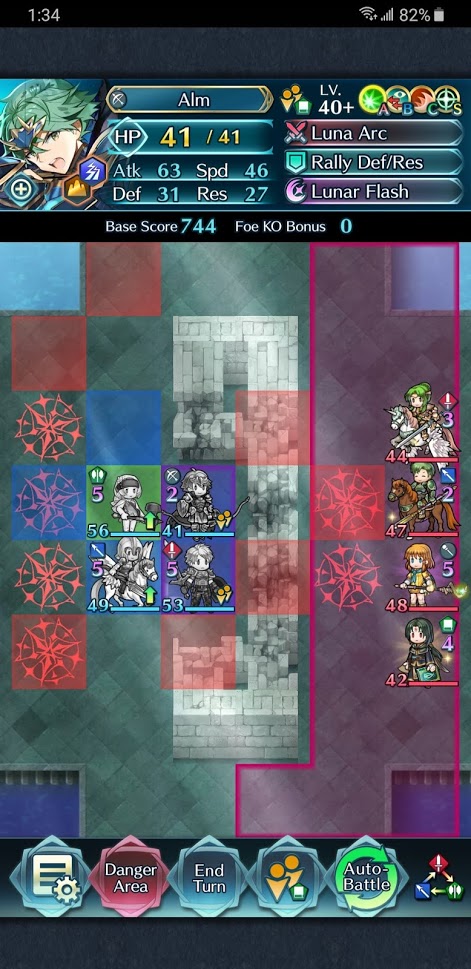
The First Turn
 The first turn is probably the one which I struggle with the most.
On turn 1, I usually attempt to enemy-phase two of their units to keep the enemy count at 4 or below.
- Two of the reinforcements will spawn at the end of the enemy’s turn 1 (if playing on Lunatic difficulty).
- If you defeat any enemy, then the other 4 reinforcements will spawn at the end of the enemy’s turn, but the turn has to be equal to or greater than 2, since the group of 2 and the group of 4 can’t spawn on the same turn.
In this attempt, I’m only able to take out one of the enemy units on this turn, which means that there will be 5 enemies on the field on the next turn.
If I had one movement assist skill, then I would be able to enemy-phase Silas or Rhajat, but since I’m trying to score high, I don’t have any of those.
By enemy-phasing two of the enemy units on turn 1, we can keep the number of enemies on the screen down.
Countering Units with Miracle
If you run into units such as Sigurd or Seliph, just run swordbreaker on your blue unit. I chose to run Reinhardt, but other weeks, I’ve paired up Alm with Abel, who has swordbreaker built-in, or sometimes Sully.
If you run into units such as Brave Ike, then all you have to do is to weaken him a bit by letting him attack into your support, such as Ylgr. Often times, I leave Ike for last because he takes more than one turn to defeat. Attacking into Ike is usually a bad idea because he’ll hit you back with Aether.
Any other unit such as Fallen Tiki can be countered by weakening them first by letting them attack into one of your units, such as Astram. Just make sure that both of them live the engagement.
Countering Extremely Fast/Bold Fighter Units
When I run into units such as Claude, or deal with units that have a bold-fighter type weapon such as Tibarn or Dimitri, I have to player-phase them. Trying to tank them is almost impossible without the use of Null Follow-Up, which is a really expensive skill that I don’t have a lot of.
If any of these show up, I have to rely on player-phase most of the time. The exception is when I run Leif, I can defeat Claude on the counter-attack because of his Meisterbogen bow.
Countering Firesweep/Dazzle Units
Since I don’t any units with Null C-Disrupt, I have to player-phase all these units. Most of the time, the healers run wrathful staff refine so they don’t have the dazzling staff refine. However, Alm has low-ish res, meaning that he take lots of damage from healers.
You basically have to player-phase all of these units, or tank them if you’re cornered.
Healing
Almost all of my units have renewal on them because healing is important. Alm and Leif are both relatively squishy and I often enemy-phase units with them, meaning that they take damage. Having renewal is really great, because Healers score low (because of their assist skill) and Herons also score low (also because of their assist skill).
Baiting Dancers
Annoying units to face in AB are dancers such as L!Azura.
By knowing a few AI movement rules such as the 5 damage rule, we can bait the dancer to attack a certain unit. Let’s use this following scenario: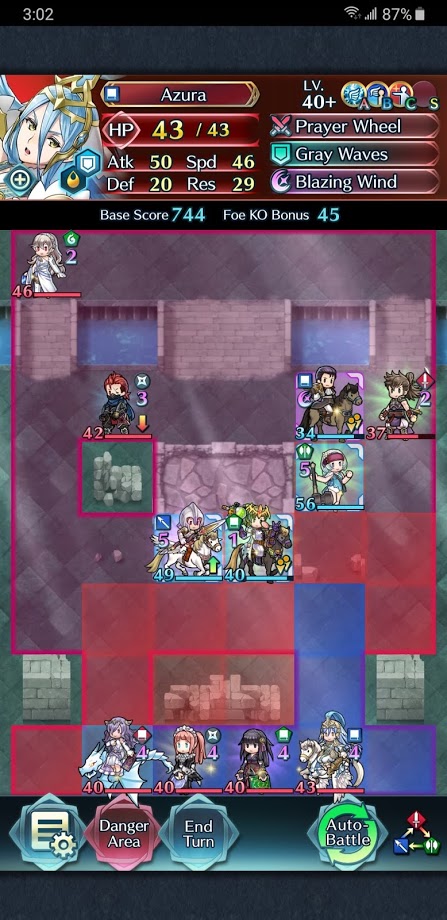 We see that Azura has 50 atk. In order to bait her and make sure that she doesn’t dance Rhajat, all we have to do is make sure that she does more than 5 damage to one of our units. For example, Ylgr has 29 res, meaning that when Azura attacks Ylgr, Ylgr will take more than 5 damage, and thus, Azura will attack her instead of dancing someone.
Knowing this 5 damage rule will make sure that the dancer actually attacks instead of dancing.
Knowing How the AI Works and Moves
If you put two units in range (above: Ylgr and L’Arachel), then you want to make sure that Azura doesn’t end up attacking L’Arachel and dying. How do we know?
Well, you can check out Verve’s AI Guide, or you can just read a simple summary that I have provided below:
Combat Result
- The AI will prioritizing getting a kill first. If Azura can defeat anyone, then she will defeat them.
- If Azura can’t defeat anyone, she’ll prefer not to die. Therefore, she’ll attack Ylgr instead of L’Arachel (draw).
- If Azura loses to both engagements, she’ll attack the person she does the most damage to.
Damage Ratio
- IF the combat result is the same for both units, then the AI will factor in the damage ratio to break the tie.
- Ratio = 3 * Damage Dealt – Damage Taken
- Damage Dealt and Damage Taken are in terms of change in HP. In other words, if you do 100 damage back, the highest “damage taken” will only be as high as your HP. If your HP is 43, and you’re taking “100 damage”, then the game counts it as you’re taking 43 damage, and not 100. We use the term “Change in HP” at the end of the battle, because skills like Sol or Mystic Boost will be accounted for.
- The one with the higher damage ratio will be prioritized, assuming the combat results were equal.
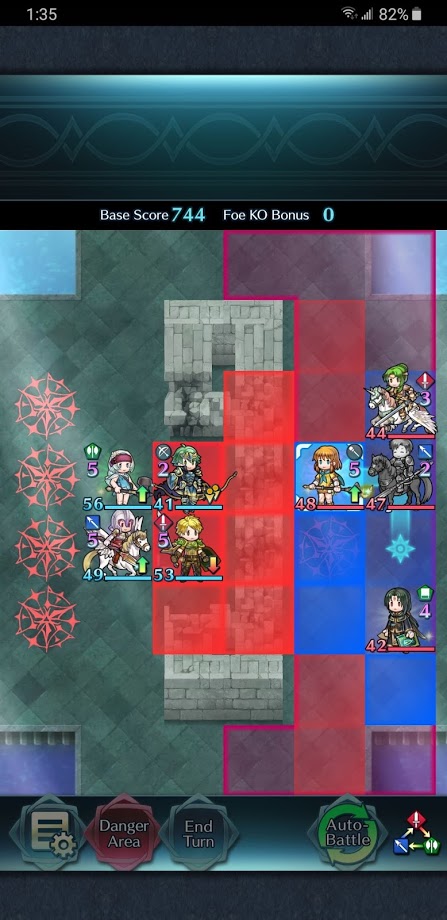
Let’s look at another example scenario.
Here are my units that I put in range.
 Astram has Spur Atk/Res 2 in his C slot (and Spur Atk/Spd 2 in his seal). Est has Drive Atk 2 and Drive Spd 2. Ylgr has double Drive Def 2.
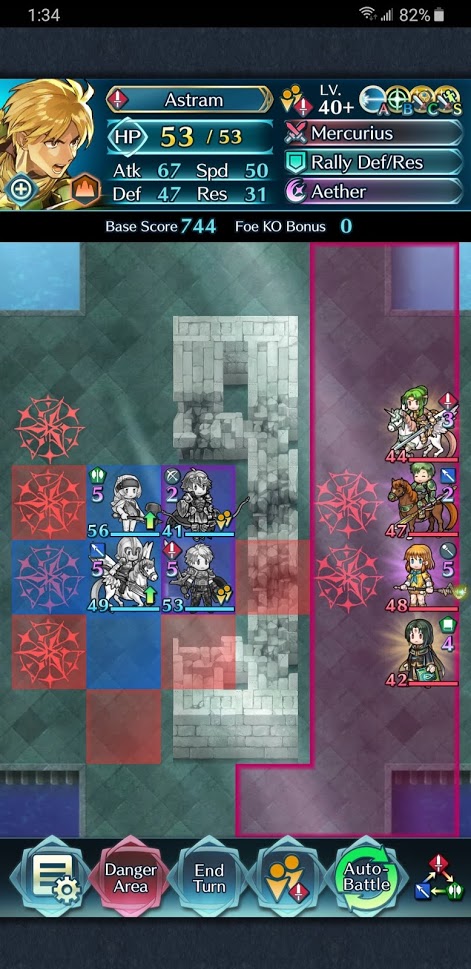 Here are the enemy unit’s stats:
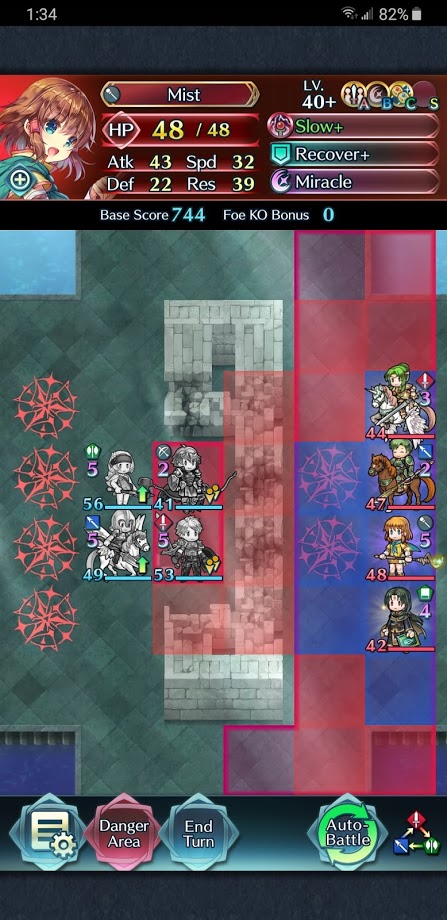
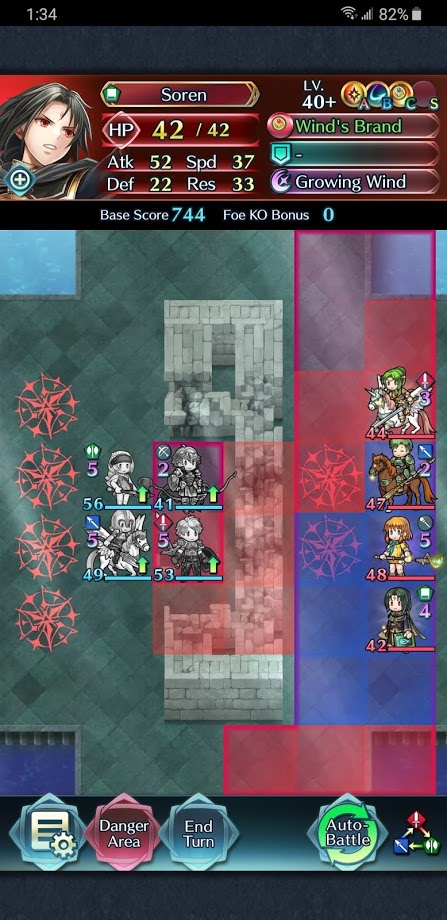
Who will Mist attack? Who will Soren attack?
Well, here’s what happens:
- Mist attacks Alm, and dies.
- Soren attacks Astram, and also dies.

Mist – Why?
- Mist loses to both Astram and Alm so that means that their combat results are the same. Moving onto the tiebreaker.
- Alm has less res than Astram. Since attacking either of them will result in a loss, the Damage Taken is 43 (because of her HP).
- So, Damage Ratio = Damage Dealt – 43
- Mist will prefer to attack the person she does more damage to, and in this case, it’s Alm, because he has lower res.
Mist will prefer to attack Alm because her damage ratio with him is higher.
Soren – Why?
- Soren only has one target, so he’ll attack Astram.
Tanking
Sometimes, you have to tank a hit and hope that your unit either kills the attacker or leaves them alive, depending on if it’s the correct color or not. A lot of the time, I’m faced with a situation where I can’t make a play where everyone’s out of the enemy’s range.
 In this scenario, I made sure that Reinhardt would survive Ryoma’s attack. Alm probably wouldn’t have survived a hit from Ryoma after being damaged by Felicia, so switching to Reinhardt will let me win, especially since Reinhardt has swordbreaker.
I sometimes tank with Ylgr and Est too, but I have to be careful because they’re both powerful units, I don’t want to accidentally defeat the wrong enemy and lose out on points.
Make sure to do damage calculations to make sure that you don’t accidentally defeat the wrong enemy with the wrong color.
Choose Pair-Up Colors Correctly
In AB, there are 10 enemy units you have to beat.
Since there are 4 colors in the game, there will not be an even distribution of colors.
For example, in one game, we could have the following enemies:
- 2 red units
- 2 blue units
- 3 green units
- 3 colorless units
This would mean that you would want to pair up a blue unit with a colorless unit, and a red unit with a green unit.
Alternatively, you could pair up a red/colorless and blue/green. This is to make sure that each of your two units gets 5 KOs instead of one having 6 and the other having 4. AB is much more difficult if one of your units has to get all of the KOs.
Recommended Supports
When making a support character, you want to make sure that they don’t accidentally get the KOs. For example, my Ylgr is super powerful and gets a lot of KOs. Additionally, you want a support that isn’t too squishy or one that is too strong. You want an average high-scoring support.
Some good supports are dancers, but they often have low scoring.
By using this arena score calculator, you can calculate your own unit scores.
Additionally, I would recommend your supports not having distant counter in order to reduce the chances of them getting a kill.
Remember, high scoring units usually have a preference weapon, so Firesweep+ weapon units usually score lower.
Mobility: I sometimes change Est’s seal out for Aerobatics because sometimes, she just gets in the way. On that one map where there were so many archers, Est just couldn’t get out of the way in time, so I changed out her seal so that she could escape.
Persistence
Sometimes, you just need a good enemy spawn or RNG. It’s annoying when enemy units have overlapping ranges.
Keep retrying and hopefully a good spawn will occur.